To read the oil level on a dipstick, park on level ground, switch off the engine and follow your car’s instructions for when to take the reading. Pull out the dipstick, wipe it clean, insert it fully and pull it out again. Compare the continuous oil film with the MIN and MAX marks. A reading within that range is normally acceptable. Below MIN needs attention, and above MAX needs a repeat check before you decide what to do.
An oil-pressure warning needs a different response. Stop somewhere safe and switch off the engine. A dipstick measures the amount of oil in the sump, not whether the engine has adequate oil pressure. A normal reading does not make it safe to ignore a pressure warning. Follow the warning instructions in your vehicle’s manual.
Read the oil film against both marks
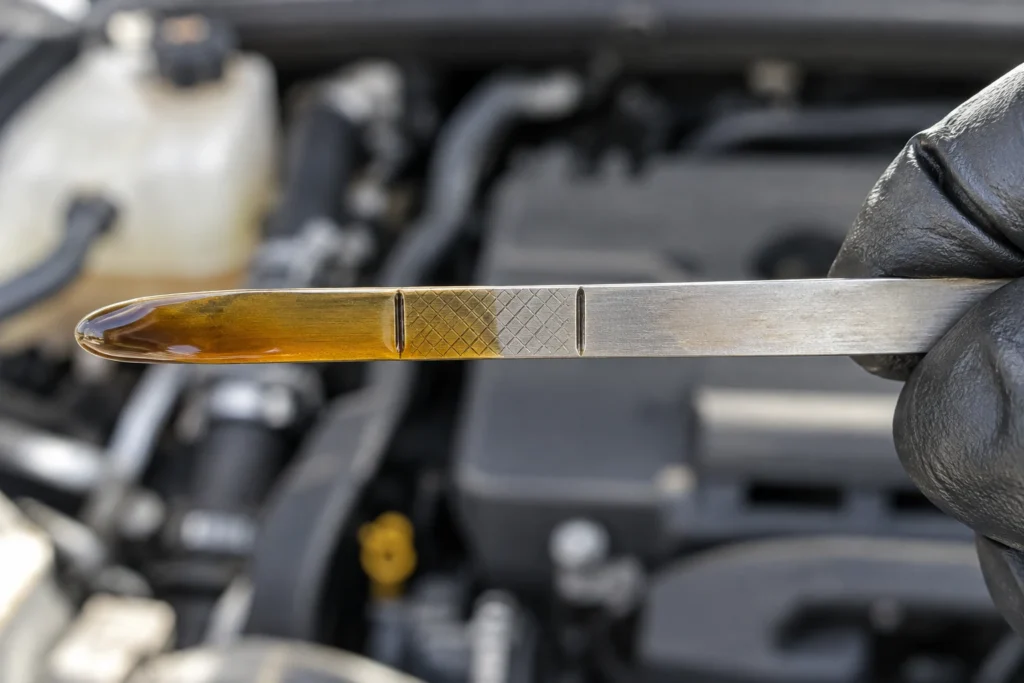
Find the measuring area near the end of the dipstick. Depending on the car, it may have MIN and MAX labels, two holes, two grooves or a crosshatched section. The lower mark indicates the minimum permitted level and the upper mark indicates the maximum. Check the owner’s manual if the markings are unfamiliar.
Read the edge of the continuous oil film across the measuring area. A thin streak farther up the metal may be oil picked up from the dipstick tube. It does not automatically show the true level. The dipstick shown in the hero image has two measurement marks, but your dipstick may look different.
| Oil film position | Meaning | Next step |
|---|---|---|
| Between MIN and MAX | Within the marked operating range | Do not add oil just to reach MAX unless your manual instructs you to. |
| At or below MIN | At the lower limit or below it | Confirm the reading, then follow the manual’s topping-up instructions. |
| Above MAX | Possible excess oil or an unreliable reading | Recheck correctly. Have a consistently high level investigated. |
| No oil on the measuring area | The level may be below the dipstick’s reach | Repeat the check and arrange a safe correction before driving. |
Do not convert the distance between the marks into a fixed number of litres. The quantity represented by that range varies between engines. A midpoint reading also does not mean the engine contains half its required oil capacity.
Prepare the car before checking the dipstick
Choose a level parking place rather than a sloping driveway, ramp or kerb. Apply the parking brake and keep the car stationary. For a physical dipstick check, the engine should be off. Allow hot components to cool enough that you can work without touching hot metal, and keep hands and clothing away from belts and fans.
The correct waiting time is vehicle specific. For example, the Honda WR-V owner’s manual says to wait approximately three minutes after switching off, while the Ford owner’s manual specifies checking before starting or waiting 15 minutes after a warmed-up engine is switched off. Neither example is a rule for every model.
Use your own manual’s hot or cold checking procedure. Guessing a universal five-, ten- or fifteen-minute delay can give a misleading result. If you compare readings over time, use the same approved conditions each time.
- Have a clean, lint-free cloth or suitable paper towel ready.
- Identify the engine oil dipstick using the manual. Some vehicles have other fluid dipsticks.
- Find the correct oil specification before topping up. Keep a clean funnel and a measured quantity of compatible oil available if needed.
- If the bonnet support or dipstick location is unclear, get help rather than reaching around a running or hot engine.
Wipe, reseat and read the dipstick carefully
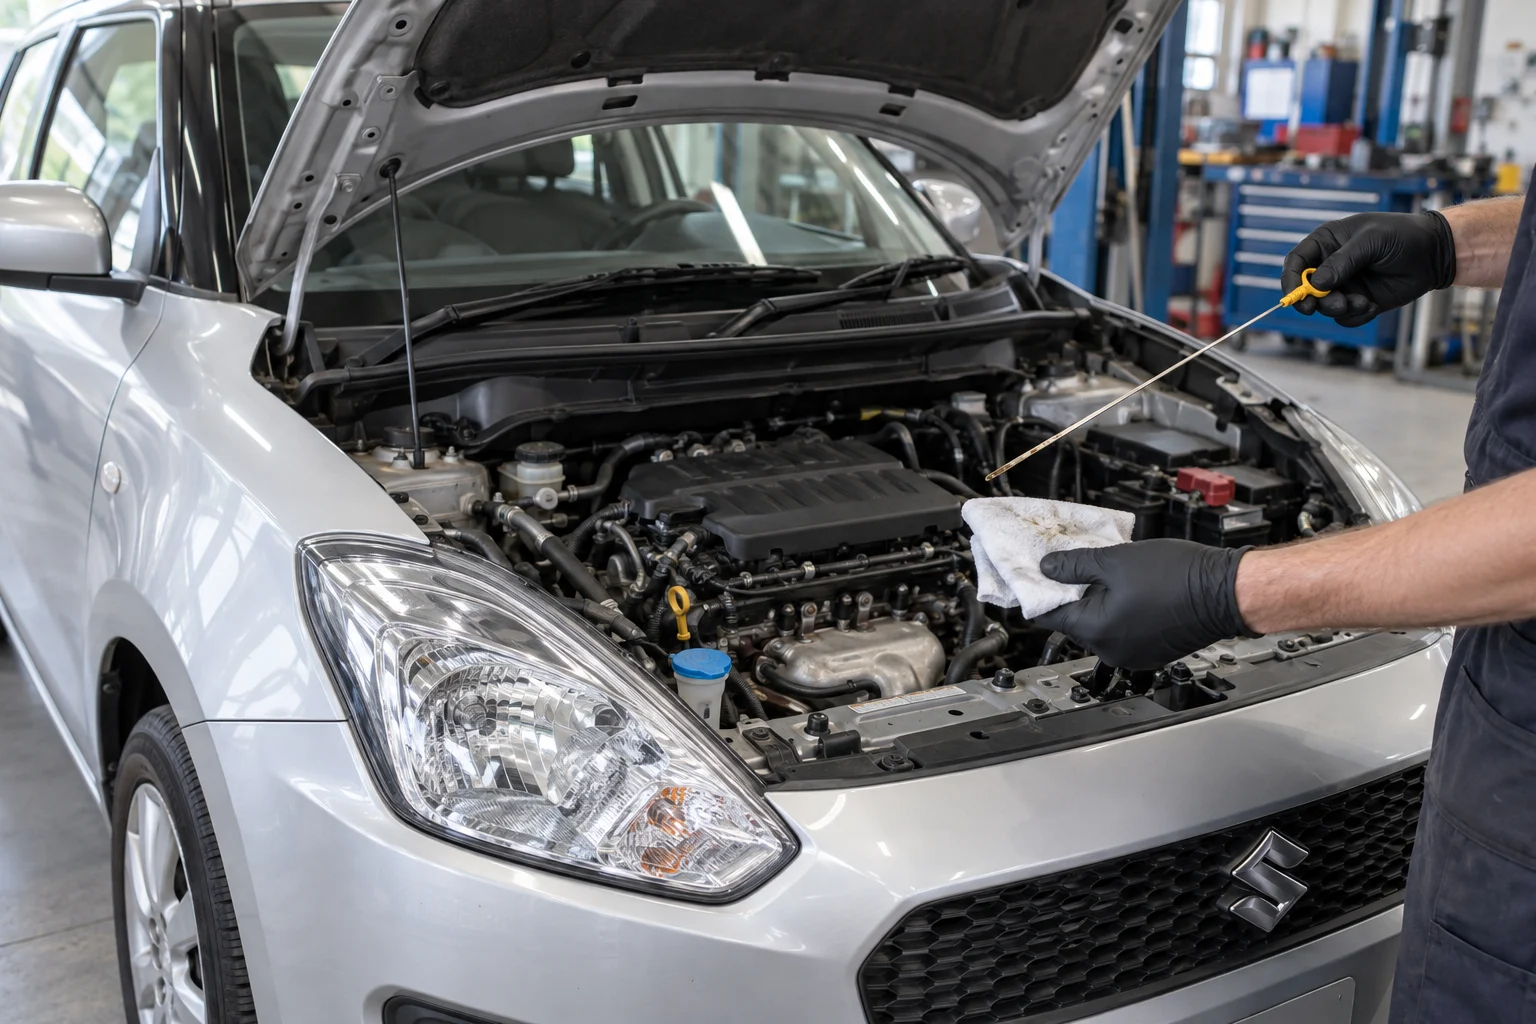
- Pull the dipstick out slowly. Hold the handle and remove it from its tube. The first coating may be uneven after the engine has been running, so do not rely on that first pull.
- Wipe the measuring section clean. Remove the old oil film with the cloth. Keep grit and loose fibres away from the dipstick and tube.
- Insert it all the way. Seat the handle as it normally fits. A dipstick left partly out changes the measurement and can make the level appear low.
- Pull it out again and inspect promptly. Hold the measuring section so the oil does not run along it. Use good light and look at both sides without touching the wet surface.
- Compare the film with the marks. Look for a clear, continuous boundary in the marked area. Repeat the wipe-and-reinsert process if streaks make that boundary uncertain.
- Refit the dipstick securely. After the check, return it to its normal seated position. If you opened the oil filler cap, refit that too before closing the bonnet.
If the two sides show different levels, follow the manual’s reading convention. Some manufacturer instructions specify using the lower side. Do not choose the higher streak simply because it is easier to see.
Repeat the check when the reading looks unclear
Fresh oil can be almost transparent, especially against shiny metal. Move into better light and look for the wet edge across the marked area. Wipe, fully reseat and check again. A photograph can help you compare repeat readings, but glare and reflections can also hide the boundary.
Smears are common when the dipstick rubs against the inside of its tube. If one side has a narrow trail above MAX but the other has a consistent film lower down, take another reading rather than diagnosing overfill from the trail. Use the same checking conditions and compare the results.
A repeatable result should show a reasonably consistent boundary. If every pull looks different, first check that the car is level, the engine is off, the specified waiting conditions have been met and the dipstick is fully seated. Confirm that the installed dipstick is correct for the engine if it has been replaced or damaged.
Do not sand, bend, heat or modify the dipstick to make it easier to read. That can affect its markings or introduce contamination. If a reliable reading still is not possible, a technician can inspect the dipstick, tube and checking procedure before deciding whether oil is needed.
Add the correct oil without overfilling it
Top up only after confirming the level and the oil specification. A viscosity label such as 5W-30 is not the complete specification. Your engine may also require a particular manufacturer approval or performance standard. Check the manual or confirmed service information rather than assuming that Dubai’s climate calls for a thicker oil.
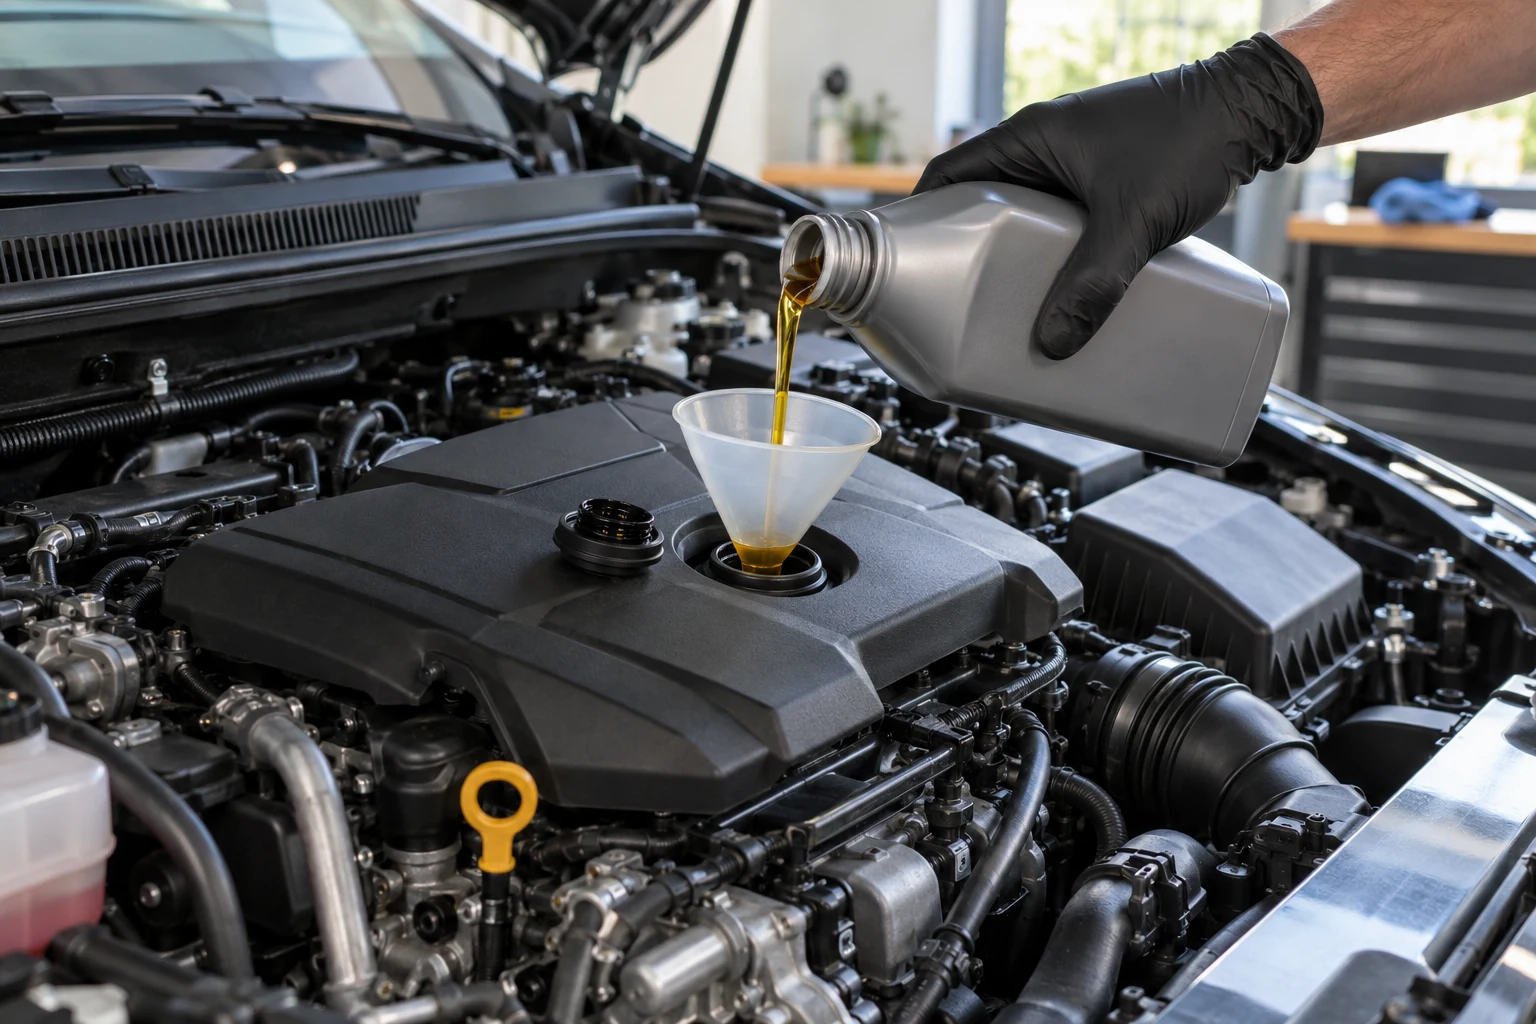
The filler opening and dipstick tube serve different purposes. Identify the engine oil filler cap before adding anything. Do not pour oil into a coolant reservoir, brake-fluid reservoir or another fluid opening.
- Keep the engine switched off and take care around hot components.
- Clean around the filler cap so dirt cannot fall into the opening.
- Add a small, measured amount of the approved oil through a clean funnel.
- Allow it to reach the sump, then recheck under the conditions your manual specifies.
- Stop once the level is within the permitted range. Do not keep pouring to chase an exact mark.
- Secure the filler cap and dipstick, and clean any spills before starting the engine.
Do not pour in the engine’s full service-fill capacity as a top-up amount. That capacity relates to a specified oil-change procedure, not an unknown shortfall in an already filled engine. If you cannot judge the quantity safely, have the level corrected by someone who can.
Handle a dry dipstick or an overfilled engine
A dry measuring area does not prove that the engine contains no oil. It means the level may be below the range the dipstick can measure. Repeat the procedure carefully. If the dipstick remains dry, do not start the engine simply to see whether a warning appears or drive to make the reading clearer.
Use the vehicle’s low-level instructions and the correct oil to restore the level if you can do so safely. If the quantity, specification or reason for the loss is uncertain, arrange assistance. A visible leak, sudden level drop, pressure warning or unusual engine noise makes professional assessment more urgent.
An above-MAX result also needs a repeat check. Confirm the parking surface, waiting conditions and seating of the dipstick. If the reading remains high, have excess oil removed or the cause investigated before further use, following the manufacturer’s instructions. Do not try to burn off excess oil by driving.
A level that rises without anyone adding oil deserves attention. Depending on the engine and operating conditions, fuel dilution or another fault may be involved. The dipstick alone cannot establish the cause. Record the readings and tell the technician whether the car mostly makes short trips or spends long periods idling.
Keep pressure warnings separate from level checks
An oil-level message and an oil-pressure warning are not interchangeable. Read the actual dashboard message and the owner’s manual. Do not rely only on the icon colour, and do not assume the check-engine light is the engine’s oil-pressure warning.
If the vehicle reports low oil pressure while running, pull over safely and switch off. Honda’s oil-pressure warning guidance explains why continued operation with low pressure can damage the engine. A full dipstick cannot rule out a pressure problem.
Adding oil may correct a low level, but it does not prove that pressure has recovered or that the underlying fault has gone. Follow your model’s warning procedure and arrange recovery or inspection when the warning persists or the instructions require it.
Understand what oil colour can actually tell you
Oil commonly changes colour during use. Dark oil is not, by itself, proof that the engine is damaged or that an immediate change is due. Similarly, light amber oil does not prove that the correct specification was used or that the service interval can be extended. Valvoline’s oil-check guidance also cautions against judging oil condition by colour alone.
Use the manufacturer’s service schedule and any relevant maintenance indicator to plan changes. Consider the documented operating conditions for your car, rather than adopting a universal mileage interval from an online guide.
An unusual milky appearance, obvious particles or an unexplained change in the oil deserves investigation. These observations are clues, not a diagnosis. For example, residue under a filler cap and milky oil throughout the sump are different observations. Neither should be turned into a certain head-gasket diagnosis without inspection.
Avoid rubbing used oil between your fingers or bringing it close to your face to assess its smell. Describe what you can see and any associated symptoms to a technician. Testing and inspection are more useful than a confident diagnosis based on colour alone.
Check electronic readings using the vehicle’s instructions
Some vehicles use an electronic engine oil measurement instead of an accessible physical dipstick. Others have both. Find the approved checking method for your exact model and engine before searching for a handle that may not be there.
The dashboard or infotainment measurement can require particular temperature, parking and engine-running conditions. Those conditions differ between vehicles. Follow the on-screen prompts and manual rather than applying the engine-off dipstick procedure to every electronic system.
If the display says a reading is unavailable, that does not mean the sump is empty. Check whether the required measurement conditions have been met. If the message continues, have the system checked rather than repeatedly adding oil without a measurement.
Track changing oil levels between scheduled services
A useful record includes the date, mileage, checking conditions, measured level and any oil added. Check at the frequency recommended for your vehicle and before demanding journeys when its instructions call for that. Use consistent conditions so a change in procedure does not look like a change in oil consumption.
There is no single acceptable consumption figure for every engine. If the level repeatedly falls, compare the pattern with the manufacturer’s guidance and arrange an inspection. Leaks, consumption and inaccurate readings require different responses, so avoid assuming that frequent top-ups are normal without checking.

Keep up with scheduled oil and filter changes even if you have topped up between services. Adding fresh oil restores the level, but it does not remove the old oil or replace the filter. Follow the specified service interval and ask the workshop to record the oil specification and quantity on the invoice.
If the level changes unexpectedly or a warning persists despite a correct reading, ask a workshop to inspect the car. Tell the technician when the problem started, whether you have added oil and which warning appeared. A fault-code scan alone does not measure mechanical oil pressure or establish every reason for oil loss, so the symptoms should guide the checks.
Common questions about reading an engine dipstick
Should I check the oil hot or cold?
Use your vehicle’s specified method. Some manuals allow a check before starting, while others specify a warmed engine and a waiting period after shutdown. For a physical dipstick reading, switch off the engine and meet the manual’s conditions before measuring.
Does the oil need to reach MAX?
A level between the marked limits is normally within the permitted range. Do not add oil just because it is below MAX unless your vehicle’s instructions require it. Adding unnecessarily can create an overfill.
How much oil lies between MIN and MAX?
That amount depends on the engine and dipstick calibration. Do not assume it is one litre. Use model-specific information and small, measured additions, checking again before adding more.
Why is one side of the dipstick higher?
Oil from the tube can leave a streak on one face. Wipe and fully reseat the dipstick, then take another reading. Follow the manufacturer’s guidance on which face to read if the results differ.
Can I drive when the dipstick is dry?
Do not set off with an unconfirmed, potentially very low level. Recheck first and restore it safely using the correct instructions and oil, or arrange assistance. A pressure warning or unusual noise needs its own urgent response.
Does black oil mean an immediate oil change?
No. Colour alone cannot establish the oil’s remaining service life. Follow the specified service schedule and investigate unusual contamination or other symptoms rather than deciding from colour alone.
Get help with an uncertain oil reading
If repeat checks remain unclear, tell My Car Repair your model, engine, dashboard message and recent readings. The team can discuss an inspection or the appropriate next step.