If your interior car lights stop working, check the lighting settings and identify whether one lamp, one door-triggered function or the whole cabin is affected. A failed replaceable bulb may need a straightforward change. A damaged connector, door signal or integrated LED unit needs a different repair, so buying a brighter bulb is not always the right starting point.
Interior lighting includes reading lamps, courtesy lights, storage lamps and ambient strips. They can share controls without sharing every component. This guide helps you describe the fault, make sensible checks while parked and understand the proposed repair before approving parts or an upgrade.
Deal with heat and repeated failures first
A single reading lamp that does not illuminate is usually a different situation from smoking wiring or a melted overhead fitting. If there is smoke, a burning electrical smell, sparking or obvious heat damage, stop somewhere safe, switch off when safe and keep away from the affected component. Contact emergency services if there is fire or immediate danger.
Do not repeatedly switch a suspect circuit on to see whether it recovers. A fuse that fails again after a correct replacement needs investigation. Never fit a higher-rated fuse or bridge its terminals with wire or foil. The fuse protects the circuit, and bypassing it can allow wiring damage.
Keep cabin lights low enough to avoid distracting reflections while driving. Map lights do not make reading a document at the wheel safe. Park before adjusting unfamiliar controls, searching under seats or testing a lighting fault. Footwell lighting also does not replace attention to the road or the correct operation of the pedals.
Identify the lamp and its intended function
Tell the workshop where the problem is and what should make the light operate. “Interior lights not working” could mean a dark rear dome lamp, a glovebox lamp that stays on or an ambient strip with one missing colour. Those descriptions point to different checks.
- Dome and courtesy lamps provide general illumination for entering and leaving the cabin.
- Map and reading lamps provide local light and may have individual switches.
- Vanity lamps may depend on a sunvisor position or mirror-cover switch.
- Glovebox and luggage lamps illuminate storage areas and may follow their own lid or latch input.
- Door and footwell lamps can provide welcome or local illumination.
- Ambient strips provide decorative illumination with controls that vary by the fitted system.
A vehicle can have several of these functions without offering colour changes or app control. Some door lights illuminate the ground rather than acting as warning lamps. Describe the actual fitted light instead of assuming every vehicle has the same equipment.
Use the symptom to narrow the investigation
Try the relevant control while the car is safely parked. Note whether the light is dark, dim, flickering, staying on or responding only to some doors. A brief video is useful for an intermittent fault that may disappear before the appointment.
| What you notice | Useful next check | Avoid assuming |
|---|---|---|
| One lamp is dark | Its switch, fitted source, holder and local supply | The whole lighting system needs replacement |
| Manual operation works, door operation does not | Door mode and the relevant door or latch input | The working bulb must be defective |
| Several cabin lamps stop together | Shared settings, supply, protection and controls | Every bulb failed at the same time |
| A new LED flickers or glows faintly | Correct application, polarity and control compatibility | A resistor is automatically the answer |
| A lamp remains on after closing | Manual override, delayed shutdown and closure signals | The battery itself caused the lamp to stay on |
The pattern helps choose tests, but it does not establish a diagnosis by itself. Mention recent bulb changes, trim work, an accessory installation, battery work or water entering the cabin. A problem beginning after a particular job is useful context, without proving that job caused it.
Check the settings without dismantling the cabin
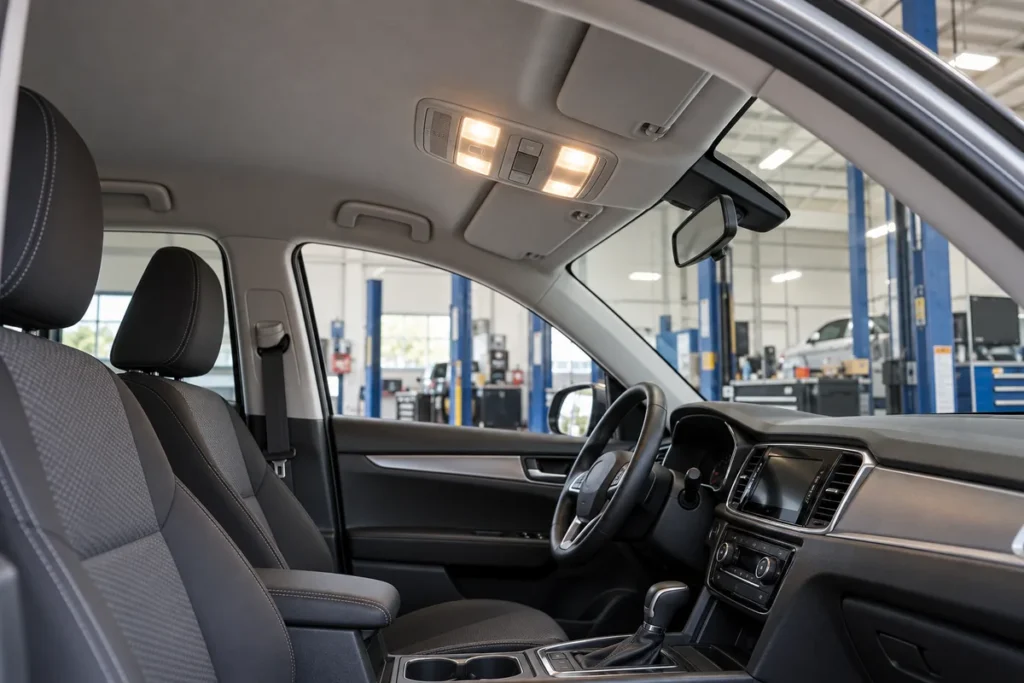
Start with the owner’s manual for your model and equipment. Some overhead consoles have a door-mode button that disables automatic illumination while leaving individual reading lights available. Other cars use an on, off and door selector. Similar-looking controls can work differently.
Ford’s C-MAX manual, for example, describes a door-function switch that can keep the lamps off when a door opens. That is a control setting rather than a failed bulb. Use your own vehicle’s instructions to identify the equivalent function and any welcome-lighting settings.
- Check the individual lamp switch and the main cabin-light control.
- Check whether automatic door illumination has been disabled.
- Compare the response to each relevant door while stationary.
- Observe any door-open indication without treating it as a complete latch diagnosis.
- Check whether ambient lighting requires a particular operating mode or brightness setting.
Do not force a door latch with a screwdriver to imitate a closed door. Do not pull roof trim or probe unfamiliar wiring as a casual check. Overhead assemblies can include microphones, sensors and other functions, while surrounding trim can be close to restraint equipment.
If the controls are unclear, photograph the console and send the vehicle model and year. This can help establish whether you need a settings explanation, a source replacement or a booked inspection. A working manual switch is particularly useful information to retain.
Choose between bulb replacement and assembly repair
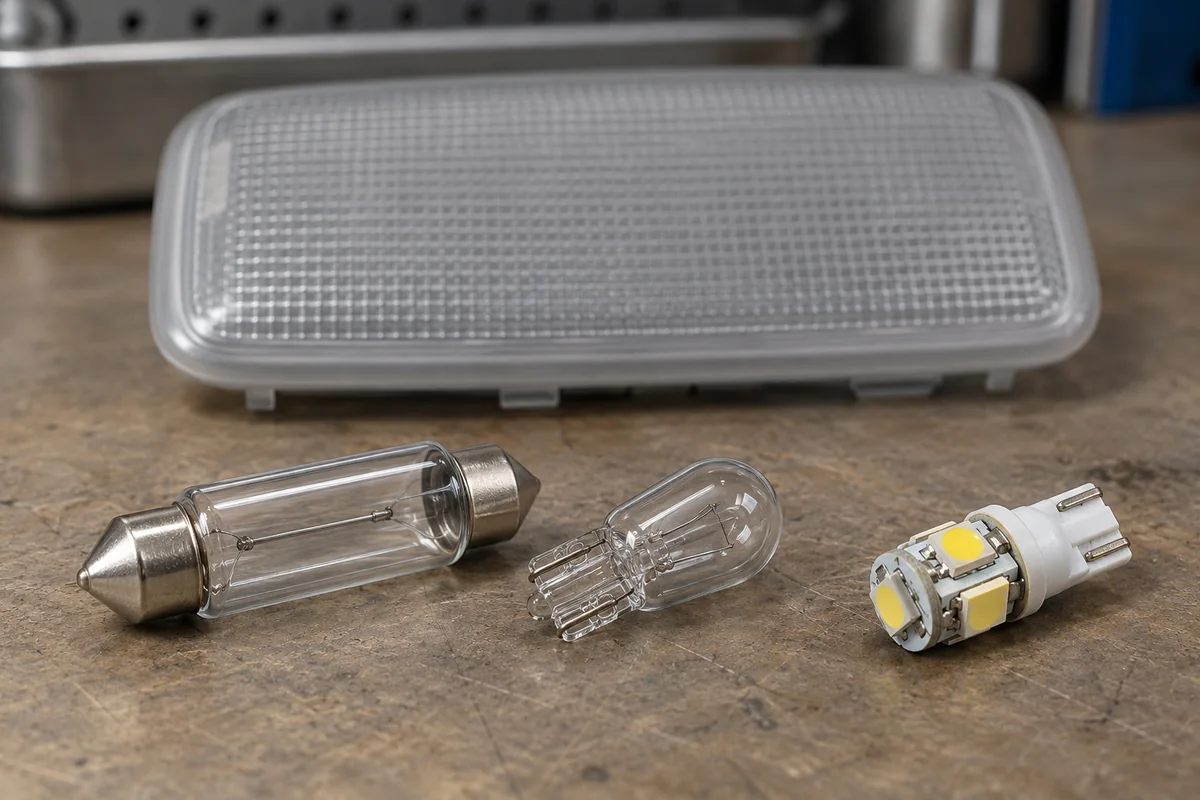
First establish whether the lamp has a replaceable source. Traditional interior fittings can use a wedge-base bulb that pushes into a socket or a festoon bulb held between end contacts. Other designs use a different base, a serviceable LED module or an integrated assembly.
Match the exact application, electrical specification, base and dimensions. A festoon that looks approximately the right length may not seat correctly, and a large LED replacement may prevent the lens closing. “Suitable for interior lighting” is not enough to establish a fit for every socket in your car.
Follow the access procedure for your vehicle
A simple change can be reasonable when the manual provides an owner-accessible procedure. Switch the light off, let the source cool and follow the specified isolation and access instructions. Use the stated release point and stop if the lens resists, clips are damaged or the assembly’s construction is unclear.
Hyundai’s interior-light replacement guidance distinguishes bulb-type lamps from an LED mood lamp that needs skilled attention. It also stresses switching the lamp off and protecting its cover and tabs. This is a useful example of why an integrated LED should not be treated as a loose bulb.
Ask whether the failed source or module is supplied separately. If the approved repair requires a complete unit, confirm the part reference and included functions. A connection repair or serviceable component may be enough when the rest of the assembly is sound.
Find the circuit fault before replacing electronics
When a correct source does not restore operation, the technician should establish whether the lamp receives the required power and control. Appropriate tests can separate a failed light from a damaged holder, interrupted wiring or an incorrect input. The exact circuit diagram matters because not every lamp is switched in the same way.
A body control module may coordinate courtesy lighting and door information. A lamp controlled by that module is not necessarily connected directly to a simple door switch. Likewise, a lamp failing to respond to one door does not automatically justify replacing the module.
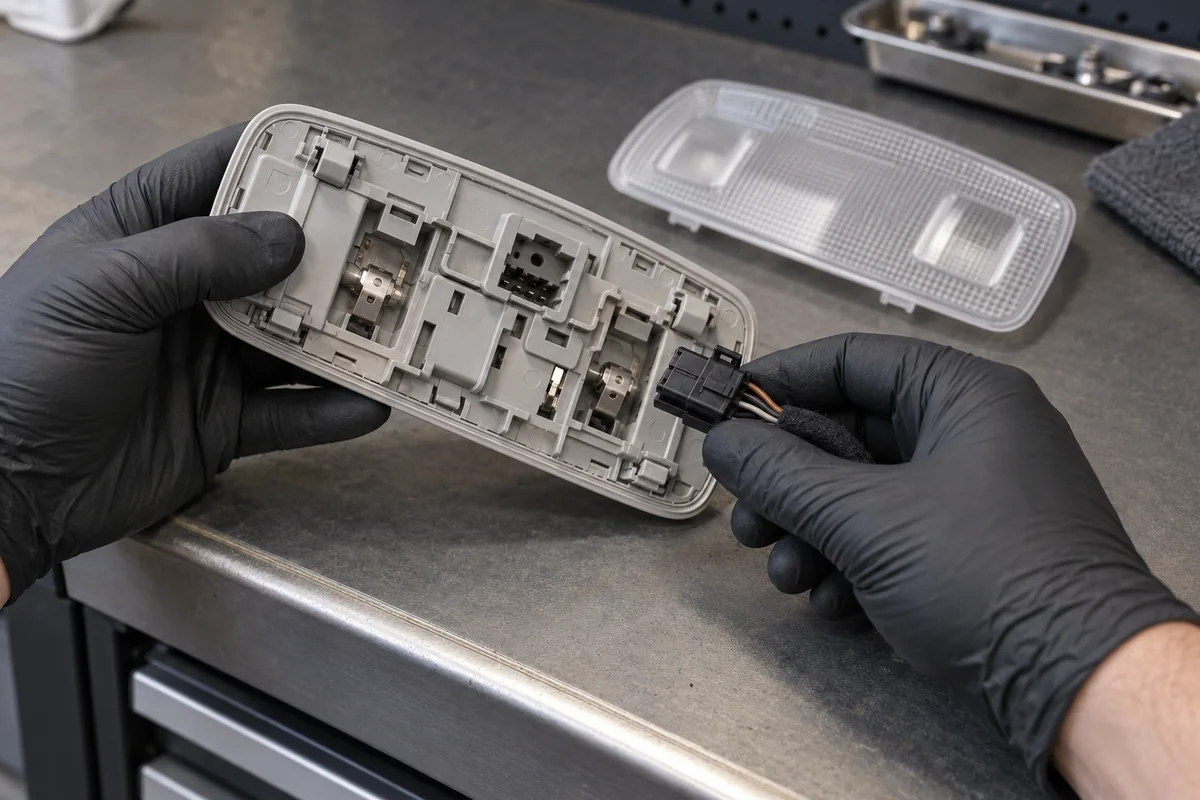
Relevant fault information, live door-status data or a controlled function test can help on supported vehicles. They complement physical circuit checks. A generic engine-code reader may not reach the body-lighting system, and a clean scan does not prove that a bulb holder or connection is sound.
- Ask which symptom was reproduced and under what conditions.
- Request the finding that supports the proposed bulb, wiring, latch or module repair.
- Confirm the specification of any replacement connector or assembly.
- Ask whether coding or setup is required for the exact replacement.
A fuse check should use the correct circuit information and the vehicle’s prescribed procedure. If a replacement fails, stop using the affected system and have the cause investigated. Repeatedly buying fuses is not a repair, and a visual glance alone may not settle an intermittent circuit concern.
Distinguish normal shutdown from lights staying on
Some courtesy lamps fade or remain illuminated briefly after a door closes. Some vehicles also turn lamps off after a period to protect the battery. The timing and conditions are model-specific, so a delay does not automatically mean a fault and there is no universal timeout to apply to every car.
Check the manual override and whether doors, the luggage compartment and storage lids close properly. A hidden glovebox or luggage lamp can be overlooked when the visible dome light is off. Avoid leaving a known unwanted lamp on overnight while waiting for an inspection.
If the battery repeatedly loses charge, tell the workshop how long the car was parked, whether any lights remained on and which accessories were fitted recently. Current draw should be assessed under the vehicle’s appropriate shutdown conditions. Opening doors or repeatedly operating controls during the test can change the state being measured.
Dim cabin lighting does not automatically prove a bad battery or alternator. Explain any starting difficulty, warning message or other affected electrical function. If the symptoms extend beyond the lights, our guide to choosing a car electrician explains what to ask about diagnosis and the proposed work.
Choose LED upgrades for compatibility and comfort
A suitable LED replacement can reduce electrical demand for a comparable lighting task, but brighter and whiter is not always more comfortable. Check the light through the original lens and compare it with the rest of the cabin. A reading light, decorative strip and luggage lamp have different jobs.
Some replacements depend on polarity. Others interact differently with dimming or lamp-monitoring controls. OSRAM’s automotive LED guidance explains polarity and monitoring-related compatibility in its replacement range. Follow the instructions for the actual product rather than assuming a “CANbus” label makes it suitable everywhere.
If a conversion produces flicker, a faint afterglow or a warning, have the application checked before adding components. Extra load resistors generate heat and are not a universal cure. Do not hide an unverified accessory against plastic trim to suppress a symptom. Returning to the correct original specification can be a sensible option.
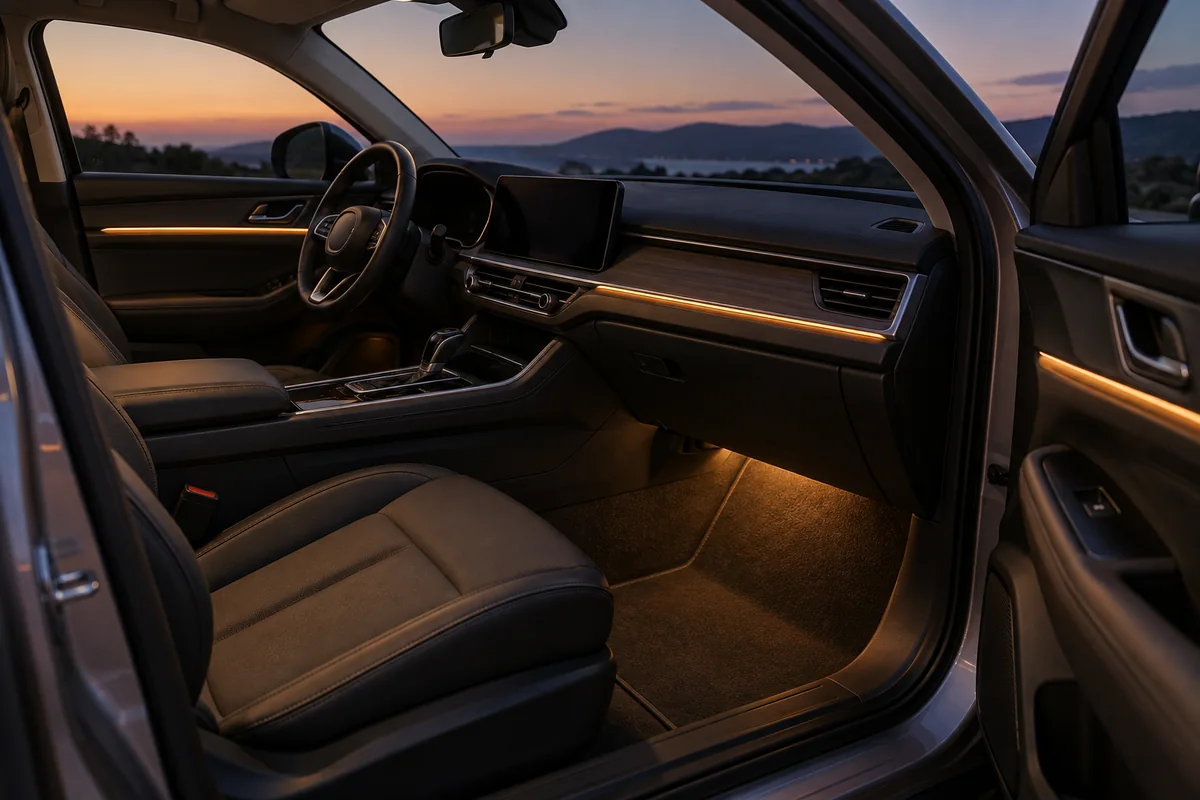
For an ambient kit, agree which areas will be illuminated, how it is controlled and when it shuts down. Wiring should avoid seat movement, pedal travel and relevant airbag areas. Ask how trim is refitted and how the installation’s power supply is protected. Colour choices alone do not describe the quality of an installation.
Compare repair quotes with the work included
A loose bulb, a complete overhead console and a multi-zone ambient kit should not share one generic price range. Identify the actual item and work before comparing totals. A basic source change may need little investigation, while an intermittent control fault can require a separate testing appointment.
The workshop’s vehicle diagnostic service lists an initial visual assessment as free and initial fault diagnosis at AED 150–350 including 5% VAT. That paid scope covers a relevant scan, agreed targeted checks and an explanation of findings. It is not a universal bulb-replacement or ambient-installation package.
Further fault tracing, dismantling, parts and repair labour are separate unless expressly included. Ask whether your complaint needs that diagnostic scope and confirm the applicable charge before booking. Diagnosis does not authorise replacement parts.
| Proposed work | What the quote should identify | Final check to include |
|---|---|---|
| Replaceable source | Correct bulb, access, holder condition and fitting | Manual and relevant automatic operation |
| Local circuit repair | Confirmed defect, connector or wiring work and access | Original symptom resolved without a recurring fuse failure |
| Module or assembly | Exact part, included functions and required setup | Affected lights and neighbouring console functions |
| Ambient installation | Kit, zones, controls, protected wiring and trim work | Brightness, shutdown and secure installation |
Request the final total including applicable VAT, the parts specification and written warranty terms. Confirm whether new clips, damaged lenses or extra access work are included. Availability and repair time depend on the actual component and findings, rather than a promise that every interior-light problem takes a few minutes.
Check the finished repair against your complaint
At collection, test the light in the conditions that originally failed. If manual operation worked but door operation did not, seeing the lamp illuminate once is not enough. Ask the workshop to demonstrate the relevant door, lid or control response.
- Check individual and main controls, including automatic mode where fitted.
- Check the affected doors and storage areas without unnecessary dismantling.
- Review any intended fade or shutdown behaviour against the vehicle instructions.
- Check secure lenses, trim fit and the other affected console functions.
- Keep the invoice, part details, findings and written warranty terms.
Report recurring flicker, heat, a warning or battery drain promptly, with the timing and conditions. Do not keep operating a damaged fitting or repeatedly reset a fault. A useful repair restores the intended function and explains any remaining concern.
Common questions about repairing interior car lights
Why does the light work manually but not with a door?
Automatic door mode may be disabled, or the relevant door input or control circuit may need checking. Compare the settings and responses before assuming the bulb or body control module has failed.
Can I replace every cabin bulb with an LED?
Only a suitable replacement belongs in each fitting. Check the base, size, electrical specification and control compatibility. Integrated LED units may not have an owner-replaceable source.
Should I fit a larger fuse if the replacement blows?
No. Use only the specified type and rating. Repeated failure calls for investigation, not a larger fuse or a bypass. Stop using the affected system until the problem is assessed.
Will a brighter lamp fix dim cabin lighting?
Not necessarily. Incorrect settings, a dirty lens, a deteriorated source or a circuit concern can affect output. Establish the cause and fitted specification before changing brightness or electrical load.
Does a factory LED fault require a complete console?
That depends on the design, separately supplied parts and approved repair method. Ask whether a source, module or connection can be repaired before approving a complete assembly.
What should I send when requesting a repair quote?
Send the model, year, affected lamp and symptom. Include a photo or video, whether manual and door operation differ, and any recent bulb, accessory, trim or battery work.
Need help checking your car’s interior lights?
Share your model, year, affected lamp and what happens with the manual and door controls. Our Al Quoz team can discuss an appropriate inspection and explain the repair options. Include a short video if the fault is intermittent.